Introduction: Are you looking for a guide on how to migrate your WordPress website from one host to another? You’ve come to the right place! In this article, we will walk you through the steps of how to migrate WordPress websites from one host to another.
Requirements:
To migrate a WordPress website to new hosting you need,
1) Old hosting Cpanel & WordPress login details,
2) New WordPress Cpanel and wp-login details
3) WordPress All-In-One Migration Plugin
4) Your precious time
& start the following process.
Step 1: Backup your WordPress Website
Before you begin any migration process, it is important to make a backup of your website. This will help you to restore your website if something goes wrong during the migration process. To make a backup of your website, follow these steps:
Step 2: Log into cPanel
1. Log in to your website’s admin panel. 2. Click on the “Backups” tab. 3. Click on the “Create Backup” button. 4. Enter a name for your backup, and click on the “Create Backup” button. 5. Click on the “Upload Backup” button to upload your backup to your server.
Step 3: Find the “Migration” Section
In order to migrate your WordPress website to a new hosting, you will need to find the “Migration” section of your new hosting account’s control panel. This section will likely be located in the “Settings” or “Preferences” area. Once you find this section, you will need to follow the instructions provided in order to migrate your WordPress website.
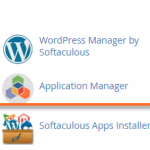
Step 4: Select “WordPress All-In-One Migration”
If you are migrating a WordPress website to a new hosting account, the first step is to select the “WordPress All-In-One Migration” option. This will allow you to migrate your website’s content, settings, and files.
1. Go to “Settings” on your WordPress site.
2. Click on “Plugins” in the left sidebar.
3. Click on the “All-In-One Migration” plugin.
4. On the “Settings” page, under the “Migration Options” heading, click on the “Add a Migration” button.
5. On the “Add a Migration” page, under the “Migration Type” heading, select “WordPress All-In-One Migration”.
6. On the “WordPress All-In-One Migration” page, under the “file” section click import.
7. Likewise import your database.
Step 5: Enter Your Source and Destination Information to migrate wp
When you’re ready to migrate your WordPress website, you’ll need to provide the source and destination information for your website.
The source information is the name of your old hosting account, and the destination information is the name of your new hosting account.
You can also provide FTP or SSH login information if you want to migrate your website using a command line.
Step 6: Click “Start Migration”
After completing the steps in Step 5, you will be asked to start the migration. Now Login to new hosting. Click “Start Migration?” to begin the process. Migration will take a few minutes to complete. Once it is done, you will be able to visit your new website at [new domain name].
Conclusion
Migrating your WordPress website can be a daunting task. But with the right tools and knowledge, it can be a breeze. We hope this article has helped you in your journey to migrate your WordPress website! Vpswala offers free wordpress hosting and free vps hosting if you to test this first on any test hosting.