Chromebooks are great for people who want to use the internet on the go. But sometimes you notice it is getting slow. Deleting your web history and browsing data can help you speed up your Chromebook and make it more responsive. It’s also a security measure that prevents others from accessing inappropriate content if someone other than you has access to this very same computer. Deleting these things not only protects against malware but also stops you from accidentally (or purposefully…?) visiting anything inappropriate when you’re searching for something specific!
It is also an essential security measure not only for you but for your family, friends, and colleagues who might use the same Chromebook. You don’t want them to know what searches you’ve been entering or what videos you’ve been watching! This can take up a lot of space on a laptop because search history is collected not just by the individual user, but by the whole family sharing one account. It also helps maintain privacy because it prevents personal details from falling into the wrong hands.
In order to make the most out of your internet browsing experience, you need a faster and safer web browsing experience. One way you can improve your comfort level is to know how to clear your search history in Google Chrome on a Chromebook. Here’s what you need to do:
Which Data can you delete from the Search History on Chromebook?
Like all other computing devices and operating systems, Chromebook enables you to delete your entire search history. No matter what type of detail you want to be erased, it is possible as well. Whether you want to delete one webpage or even an entire saved website, it’s possible with the help of this product. We understand that there are specific details linked with autofill information that might be used for a spam message from random third parties. However, the Chromebook feature allows its users to erase pertinent details related to their files and visiting history on the web.
Steps To Delete all your Chromebook Browsing History
The following steps will help you get to the section of your browser where you can access all history-related settings. Let’s see them.
1) Open a Chrome tab and click the “Customize and Control Google Chrome” button at the top-right corner, just next to your extensions bar.
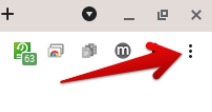
2) Once you have done that, many more options will appear, among which “History” is also present. To continue, click on the link.
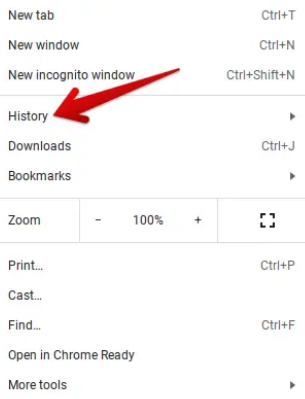
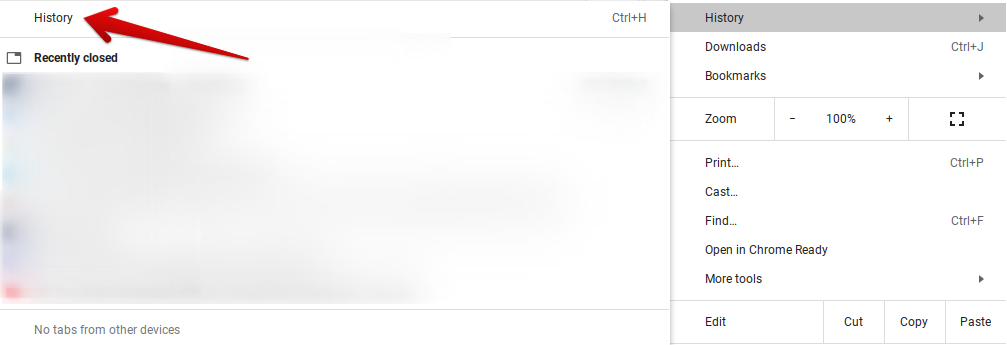
3) After the previous step, your options will expand further. To access the full-blown settings for this section of Chrome, you will need to click again on “History”. You can also use a keyboard shortcut to open the “History” settings directly without having to do the previous two steps. The shortcut is “CTRL+H.”
4) In the left column of the page that opens, you’ll see the option to “Clear browsing data”. To continue, click on it.
![]()
5) Once you have done that, a new page will be opened for you. This page will show you how to delete your browser history. After the page loads, you will see a smaller window in the middle of the screen. Here you can continue. You can delete your history here. There are many options available. These include deciding when to remove past searches and removing cookies and cached images. You can also check out the “Basic” or “Advanced tabs to see what you could remove from Chromebook. After you click “Clear data”, a prompt will appear to confirm that you want to continue. You should do that immediately.
That’s it! Click on “Clear Data” to see your browsing history removed from Chromebook. There is an option to delete individual websites and keep your browsing history. Let’s take a closer look.
Removing individual websites from your Chromebook
These are the steps to get you started.
1) To quickly get to the page, use the keyboard shortcut “History” CTRL + H.
2) Once you are there, you will be able to see all your previously visited websites in order. Each website will have a checkbox you can mark. You can mark it to make it disappear. Below is an example.
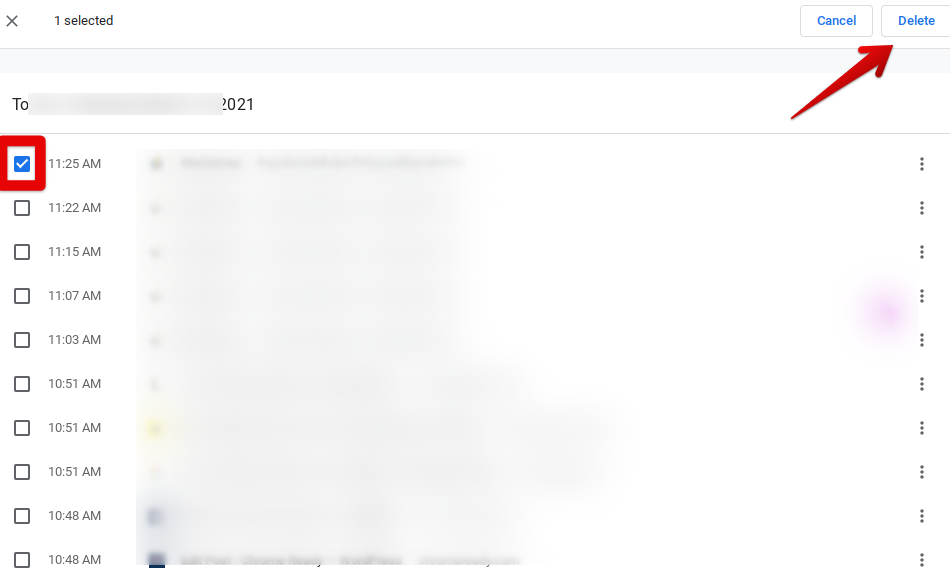
3) When you mark an item, an option will be presented to empty it in the preferences panel in the upper-right corner. The process is the same regardless of how many websites are deleted.
This is it for the tutorial. We hope this tutorial helped you get your history removed on time.